Only a few years ago we thought it was OK to work all day bathed in fumes, wash our hands in acetone and go home to dinner. We've learned a lot about organic chemical vapors since then and how they affect our bodies and none of the news is good.
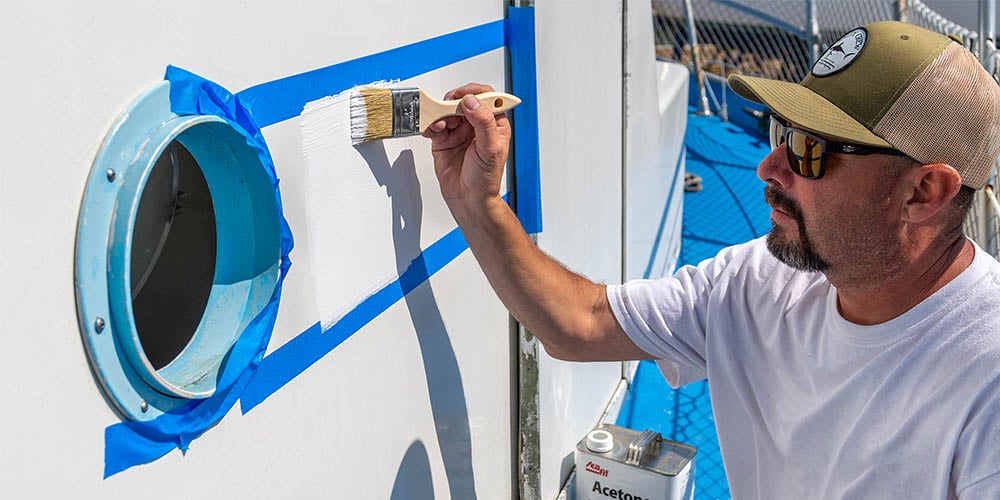
Before you start your project make sure to protect yourself with disposable gloves and a vapor-absorbing respirator mask. Wear coveralls and a head sock as well to keep dust and splatters off your skin. If you are unfamiliar with the products you will be using and you are unsure how to handle them, check them out in our catalog or on our site for safety information. A good rule, especially when using two-part marine paints, is that if you can semll it, you need more fresh air or the next higher grade of respirator mask. Once you have all your PPE ready to go it's time to jump in to your project. We'll walk you through everything you need to topside paint your boat.
- Where to Get Help
- Choosing the Right Paint
- Primers and Undercoats
- Preparation
- Applying the Finish
- Do's and Dont's for Great Paint Finishes
Where to Get Help
We at West Marine—along with our paint and maintenance equipment and supplies manufacturers—are eager to see that you get the best possible results from the products we carry. You will find basic hints here in the West Advisors. For more specialized tasks, such as repairing blisters or heavily damaged areas of your boat, see the broad range of books and videos listed in our catalog or available on this website.
We have handbooks and manuals from many of our suppliers that we are happy to send you at no charge. Interlux’s Boat Paint Guide and Color Chart (Model 5422381) and Pettit’s Boat Painting Guide (Model 10484244) are two examples, available for free download below. Also, several of our major paint suppliers list toll-free phone numbers that you can call during business hours for help. Finally, of course, our West Marine Product Advisors are available by phone Monday through Friday, 6:00AM–5:00PM (Pacific Time) at 1-800-BOATING (1-800-262-8464).
Choosing the Right Paint
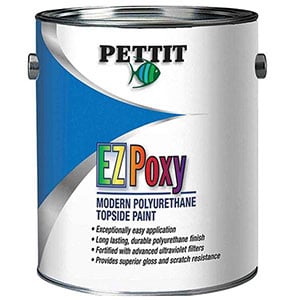
Great for non-professional painters. EZ Poxy is very easy to apply, relatively non-toxic, adequate gloss and longevity.
One-part polyurethane: This type of topside paint is by far the most popular choice, and the one we recommend most highly. We consider it ideal for do-it-yourselfers who can achieve near-professional results with a brush or roller. And even though it’s not quite as hard or durable as two-part polyurethanes, many professional painters find it close enough in appearance that they prefer it to all other enamels. Look at Pettit Easypoxy, Interlux Brightside or West Marine SeaGloss Pro.
Two-part polyurethane: Second in sales, this is the hardest, highest-gloss, most durable paint available. Some can be brushed or rolled but others must be sprayed. More attention is required for surface preparation and priming than for one-part polys, and they are generally more toxic, especially when sprayed. Examples are Awlgrip, usually applied by professionals, and the simpler Interlux Perfection.
Some two-part polyurethanes lift oil-based paints, so check for compatibility with the paint that’s now on your boat. We tend not to recommend this to recreational boaters; manufacturers recommend application by professionals only. So if you decide to go it alone, at the very least, visit the manufacturer’s website and follow their advice to the letter.
Alkyd enamel: This traditional oil-based paint is easiest for the amateur to apply using a brush. Still very popular, it is more compatible with underlying surfaces, more economical and doesn’t require as much fuss as polyurethanes; however gloss and color retention are lower. For the traditionally-planked wood boat, alkyd enamel, like Z-Spar Marine Enamel, is a good choice for dealing with the expansion and contraction of wood. Its oils are also chemically compatible with the wood’s natural oils.
Primers and Undercoats
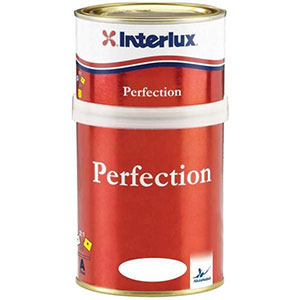
A simpler system than Awlgrip or Sterling, Interlux Perfection gives the gloss retention and durability you expect from a two-part polyurethane.
Paint chemistry has become enormously more complicated since the days when all that was required was to grind up some pigment and mix it with oil and thinner. Today’s paints are far brighter, tougher and more durable than those of even a few years ago. But there is a price to pay for these advances that isn’t just monetary; they require that we pay far greater attention to how we use them to get the maximum benefit from these paints. Applying a paint today, whether brushing, rolling or spraying, is only the final step in an elaborate chemical process.
Manufacturers have clearly detailed what the preliminary and intermediate steps are such as primers and undercoats. So read the instructions, making sure to have exactly the right products on hand to complete the step-by-step process. (Caution: You can always find people around boatyards who will tell you to take shortcuts, like substituting materials or painting when it is colder or hotter than recommended. Our advice is to tell them to demonstrate their pet theories on someone else’s boat.)
Preparation
Experienced painters will tell you that if the surface does not feel smooth to an ungloved hand, putting another coat on top will not fill in the surface imperfections or improve it. Careful and thorough preparation from the start and during each successive step is the secret to professional-looking results. And preparation, in many instances, is just another word for having the right supplies. You need an abundant supply of the proper grades of sandpaper, the exact thinner and wiping solvent recommended by the manufacturer and lots and lots of clean rags to make the job go quickly and pleasantly and to help you achieve a superior final result.
- Check the condition of existing paint to determine the prep work required. Look for areas of damage, separation or peeling, or other signs that the paint doesn’t have a firm hold on the substrate.
- Clean bare fiberglass with a solvent wash like West Marine Thinner & Dewaxer, Interlux 202 or Pettit 95. For previously painted surfaces, remove contamination with Interlux 216 Special Thinner or a similar solvent.
- Re-inspect the hull to ensure that no damage has been missed.
- If the paint is in good condition, sand with 220–320 grit wet-or-dry sandpaper and when dry, wipe with a cloth dampened with Pettit 120 Brushing Thinner or Interlux 333 Brushing Liquid to remove any dust residue.
- If the paint shows localized areas of damage, repair these with a sandable epoxy filler.
- If the existing paint is cracking, peeling or generally shows signs of separation over the whole area, it should be completely removed. Typical methods are scraping, sanding, grinding and/or using a chemical paint stripper.
- Applying an undercoat provides added depth of color and durability for your finished painting job.
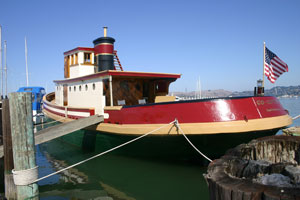
During the 1980–88 restoration of this 1923 tug, Go Getter, we used alkyd enamel over red lead primer (still widely used today by traditional boatbuilders despite its toxicity).
Applying the Finish
Applying by brush: Use the largest brush that is practical for the job. Paint brushes with long flexible bristles, like those on our Flagship Badger brushes, are best for gloss paints. When applying by brush, a good technique is the “criss-cross method.” Paint is applied to the surface with a diagonal brushing action from the left and right (Step 1). This is then spread further with horizontal strokes (Step 2) before finally “laying off” with light vertical strokes (Step 3). This results in any brush marks being able to flow out to give the most even finish.
Note: We have had good results applying marine enamels using a disposable foam brush (especially when performing small touch-up jobs). The main benefit of this technique is that you do not need to clean brushes using multiple buckets of gradually cleaner solvents.
Applying with brush and roller: You can get a good gloss finish using a solvent-resistant, high-density closed cell size foam roller. This minimizes the formation of bubbles in the surface that can occur with mohair and large cell foam rollers. The paint applied will be thinner, so more coats will be needed.
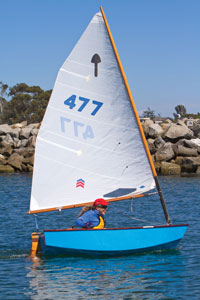
We painted this El Toro with Interthane Plus (now called Perfection) in 1996. The finish has held up amazingly well over 21 years of use.
Using this method, otherwise called the roll and tip method, involves using the roller to apply paint to the surface, followed with the brush, which is used to create a smooth, even surface by “tipping off.” This method works particularly well when two painters work side by side. While many traditional painters apply topside finishes by tipping off horizontally, we think most do-it-yourself painters will achieve better results using the three-step method we described above.
Do’s and Don’ts for Great Paint Finishes
- Ensure an even spread by holding the brush at a 45° angle—this minimizes brush marks.
- The best finish is achieved on large areas by two people; one to apply the paint, the other following immediately behind to smooth the finish.
- Clean or change brushes every 20 minutes or so.
- Always use lint-free cleaning cloths.
- Stir the can occasionally during the work.
- Dampen the ground with water before beginning painting to avoid stirring up any dust.
- Use a worn brush for the final coat. This will ensure fewer brush marks.
- Painting is best on warm, dry mornings. Cold weather retards drying and dampness will spoil the gloss.
- Always pour the amount of paint that you expect to use at any one time into a separate container. Do not paint directly from the can, as this will introduce contaminants.
- Use 3M Fineline masking tape to ensure good, crisp lines.