If you store your boat in the water at least part of the year, keeping the hull free of marine growth with one or more coats of quality antifouling paint is critical to keep it performing its best—and for reducing fuel costs. This preventative maintenance task should be at the top of your list. A clean hull is safe, fast and efficient—while a fouled bottom will reduce your boat's speed, maneuverability and cost you more at the fuel dock.
This article will help you select the right bottom paint to keep your boat’s hull free of marine growth and also help you with hull preparation and paint application. Knowing which products to select and how to use them can save you hundreds of dollars over the cost of paying a yard to do the work.
- Do Your Homework
- Make a Shopping List
- Select Your Paint
- Bottom Preparation
- Applying the Paint
- Timing
- Final Thoughts
Do Your Homework
Before starting, we suggest you bone up on your bottom painting by first reading our West Advisor Top Ten Antifouling Paint Buying Questions. Then, depending on the brand of antifouling paint you select, take a look at one of these painting guides: West Marine Boater’s Painting Guide or the Interlux Painting Guide. If you plan on painting over an existing coat of bottom paint, the paint you select must be compatible with the paint you choose. To avoid problems, check the Interlux Antifouling Paint Compatibility Chart or the Pettit Antifouling Paint Compatibility Chart.
Make a List
If the job will be confined to applying bottom paint (no barrier coat), you will need the following tools and supplies:
- Bottom paint of your choice
- Appropriate thinner and solvents
- Paint tray, liner, roller frame, solvent-resistant roller
- Fineline and Blue masking tape
- 2" and 4" Chip Paint Brushes for cut-in
- Drop cloth for spills
- Rags and tack cloths
- Paint buckets and stirring sticks
- Power drill driven Paint mixing tool
- Disc or orbital sander, electric or air driven
- 80-grit sanding discs
- Painter's suit with hood
- Foot covers
- Goggles
- Organic vapor dust mask and/or (for solvent based paints) respirator
- Gloves
Plan Ahead
You can’t change the weather, but you can pick a favorable time when the conditions are good. Manufacturers say it’s best to apply boat paint when temperatures are in the 50°–85°F range and humidity is below 65%. If you don’t have access to a heated shed, plan to do the job when conditions in your area are closest to these parameters.
When hauled out for a bottom job, allow extra time for chores such as disassembling and lubricating seacocks, replacing worn transducers and inspecting rudder bearings. You may want to pull and inspect the propeller shaft and bearings.
Be Patient
You shouldn’t rush paint jobs, especially when you are working in open air. Sometimes the weather does not cooperate. It may be too cold, too hot, too humid, or too windy to start a job. In that case we recommend you wait until conditions improve. The results will be worth the extra time. Not only will the coat of paint look better, it will deliver better antifouling performance and it will last longer.
Paint Selection
Antiflouling paint prevents marine organisms such as barnacles and zebra mussels, weeds, slime and algae from attaching themselves to the hull. Most antifouling paints use the dissipation of metal as a toxic biocide (on the hull’s surface and adjacent to the hull in the water) to prevent these bothersome critters from adhering.
Antifouling paint choices tend to be regional, with boaters in the Great Lakes, Pacific Coast, Southeast, Gulf Coast and other areas choosing similarly to their neighbors in the local marina. Using the same paint as your neighbor might work well for you, however you should also consider how you use your boat and the type of paint you applied in the past, since there can be compatibility problems between different formulations. In general, softer paints can be applied over harder paints but not vice-versa; vinyl paints should only be applied over vinyl paints. There are exceptions however, so it’s always best to consult a compatibility chart.
Copolymer Ablative Paints Let You Paint in the Fall and Launch in the Spring!

If you use your boat frequently, a copolymer ablative paint might be for you. These paints offer several advantages over hard modified epoxy paints. First, they release their biocide at a constantly controlled rate as they wear away or “ablate”, much like a bar of soap. This feature reduces paint build-up and the need for sanding at haulouts. The second advantage is that in general, unlike hard modified epoxy paints, copolymer ablative paints do not lose their antifouling ability when exposed to air; which means that prior to winter storage, you can paint your boat and be ready to launch in the spring. (Light sanding or scrubbing may be necessary prior to launch.) This is a big time-saver for those living in northern climates. Another advantage of copolymer ablative paints is that although they are loaded with less copper compared to modified epoxy paints, controlled polishing enables them to use their copper content more efficiently.
Copolymer paints, such as West Marine PCA Gold, Interlux MicronCSC® and Micron Extra SPC, and Pettit Odyssey® HD offer true multi-season protection, lasting as long as there is a reasonable coating thickness. Because they expose new biocide until the coating is worn completely away, additional coats add to their longevity. Pettit Hydrocoat offers the added benefit of being a water-based product with no solvents, an environmental plus, so there are fewer fumes to protect yourself from and easier clean-up using only water.
Do You Want Bright Colors?

If you want your bottom paint to really dazzle, use one that contains white copper (cuprous thiocyanate), zinc or ECONEA® as the biocide. White copper is clean white in color and used in brightly colored paints such as Pettit’s Vivid and Interlux Trilux 33. White copper formulations require 50% less copper than heavier conventional antifouling paint formulated with dark cuprous oxide. White copper produces the brightest colors, whitest whites and blackest blacks.
Paints that contain ECONEA as the biocide are another choice. ECONEA is a metal-free biocide that, depending on the paint formulation, can be as effective as cuprous oxide at about one tenth the concentration in paint by weight. This results in a brighter range of colors compared to darker cuprous oxide based paints. See more about ECONEA below.
Hard Modified Epoxy Paint
If you keep your boat in the water year round, you are most likely a candidate for a hard, high-copper-content hard modified epoxy paint that prevents growth by leaching biocides upon contact with water. Contact leaching paint releases the biocide at a steadily decreasing rate, leaving a hard coating of the original thickness at season’s end. Higher copper content generally means better performance in this paint type.
Modified epoxy paints adhere tenaciously to most surfaces, and can be applied over most types of paints. Since modified epoxy paints (unless scrubbed frequently by a diver) do not wear away, build-up will occur with each new coat and eventually your hull will need to have the coating stripped.
Modified epoxy paints with a relatively low percentage of copper are the economy single-season choice if you’re in the Northeast or other regions where you dry-store your boat in winter and don't mind having to repaint in the spring. Two affordable and popular modified epoxies are West Marine BottomShield and Interlux Fiberglass Bottomkote NT, which are budget choices compared to more sophisticated ablative paints or high-copper modified epoxies. They offer hard, durable finishes with between 25% and 28% copper content.
Composite Copper Technology (CCT)
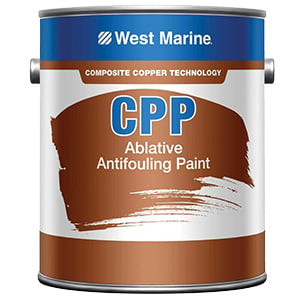
These are relatively new formulations that replace the binder of traditional cuprous oxide in a modified epoxy paint with environmentally friendly matrix of silica, reducing the copper footprint by up to 40%. These formulations use less copper more efficiently compared to modified epoxy paints. An example is West Marine CPP Ablative Antifouling Paint with Composite Copper Technology.
Thin-Film Paints
Freshwater locations like the Great Lakes are plagued primarily by algae, and thin film paints such as VC 17m Extra and are a good choice for these environments. They offer a super-slick PTFE finish to keep growth from attaching to the hull, in addition to one or more biocides. They dry almost instantly, so you can rapidly apply several coats and launch almost immediately. Because they are so thin, they must be applied with either a solvent-resistant foam roller cover or by spray with an airless sprayer. Racing sailboats used in freshwater are an especially good candidate for these paints.
Sloughing and Vinyl Paints
There are two other types of paints we’ll mention. Neither is as popular as today’s modified epoxies and ablatives, but you should still know about them, especially if you happen to buy a boat with either type on the hull. Soft or “sloughing” paints used to be very popular among cruising sailors in northern climates because they are very economical and last for a little longer than a season. Like ablative paints, sloughing antifoulings wear away as the boat moves, so the more often the boat is used and the faster it goes, the quicker the paint wears off. Sloughing paints are very soft, so few paints can be applied over them.
Vinyl-based paints are slick, hard paints that can be burnished to provide a smooth surface preferred by owners of performance boats. Unlike thin-film paints, vinyl paints like VC Offshore can be used in salt-water, although their antifouling effectiveness is inferior to high-quality modified epoxies and ablatives. Vinyl-based paints can only be applied over an existing vinyl paint. Very thorough sanding is required to achieve a good bond when painting over vinyl coatings with other types of bottom paint.
Paint for Aluminum and Underwater Metals
Never apply an antifouling paint that contains cuprous oxide on an aluminum hull or outdrive. Doing so will result in galvanic corrosion that will damage or even destroy the hull. Instead, select an aluminum-safe bottom paint that contains a compound of zinc, cuprous thiocyanate, or a non-metallic agent, such as ECONEA™ as the biocide. Examples include Vivid (cuprous thiocyanate), Trilux 33 (cuprous thiocyanate), ECO HRT and Hydrocoat ECO (ECONEA).
For painting underwater metals, Propspeed has emerged as one of the most popular formulations on the market today. Propspeed contains no biocide at all. Instead, it is a super-slick coating that easily sheds marine growth. Propspeed is used on underwater metals, including props, struts, shafts and keel coolers.
More About ECONEA
As restrictions on copper-based antifouling paints increase, a pharmaceutical alternative has emerged. The alternative biocide now employed in an increasing number of paints is ECONEA™, which is a metal-free antifouling agent developed by a pharmaceutical company. Depending on the paint formulation, ECONEA can be as effective as cuprous oxide at about one tenth the concentration in paint by weight. ECONEA-based paints like Interlux’s Pacifica Plus and Pettit’s ECO HRT are now available at a competitive price.
Bottom Prep
Good preparation and priming are the basis for any paint job and antifouling paints are no different. Solid prep ensures good adhesion and better performance over time.
If you are painting a new boat for the first time, wipe down the entire bottom with a good solvent wash such as Interlux 202 or Pettit Dewaxer to get rid of all mold release agents from the factory. To avoid just spreading the mold release agent over the hull, turn your cloth frequently and replace often with a clean cloth. You can then lightly sand the hull with 120-grit sandpaper or use a no sand primer instead, such as Interlux InterProtect® 2000E or Pettit Protect®.
Dealing With Old Paint
However, since most of us will be recoating over a previously painted bottom, we will need to make sure the surface is prepped for another coat. Check the bottom paint compatibility chart below to see if the paint you plan to use is compatible with what’s on your boat now. If old paint must be removed because it’s incompatible or too deteriorated to overcoat, be sure to have Aqua-Strip™, Ready-Strip® or other stripper system or other material on hand.
If the old paint is known and in good shape: Remove old loose paint, dirt, grease, and marine growth with a power washer, brush or scraper. Wipe down with solvent wash. Sand with 80-grit paper. Exercise caution to avoid sanding through a barrier coat that may have been applied to prevent fiberglass blistering or damaging the gelcoat of the hull. Repeat solvent wash. Clean with the thinner recommended by your paint manufacturer. If you have to apply gelcoat blister protection, follow your manufacturer’s guidelines for surface and tie coat priming before you proceed with the paint application. If blister protection is not needed, you can apply paint directly to the sanded surface or the fiberglass.
If the old paint is unknown and in good shape: Clean, remove loose paint, sand (80-grit paper) and rinse with water. Apply the recommended number of coats of tie coat primer such as Interlux Primocon or Pettit 6627 to ensure optimum paint adhesion. Then simply apply the antifouling of your choice following the manufacturer’s instructions. Some slippery Teflon paints such as the Interlux VC-17m series may need to be removed before applying an incompatible paint.
If the old paint is unknown and in bad shape: Remove the old coats of antifouling paint. Use paint remover that is compatible with the material of your hull. You may have to apply the paint remover several times to get rid of all the layers. If you are a racer or a stickler for a super-smooth bottom, the dreaded sanding longboard may have to come out. Once the paint is stripped, check for damage to the barrier coat that provides blister protection (if there is one) and patch it where necessary. If the hull does not have an epoxy barrier coat this is a good time to consider applying this protection. Then proceed with painting.
Cleaning a Dirty Hull
Power-washing works great to remove any remaining dirt or light fouling. For heavier fouling, use a strong acid-based bottom cleaner such as MaryKate’s On-Off. Be sure to wear eye protection, a good respirator and rubber gloves, as the cleaner is very caustic.
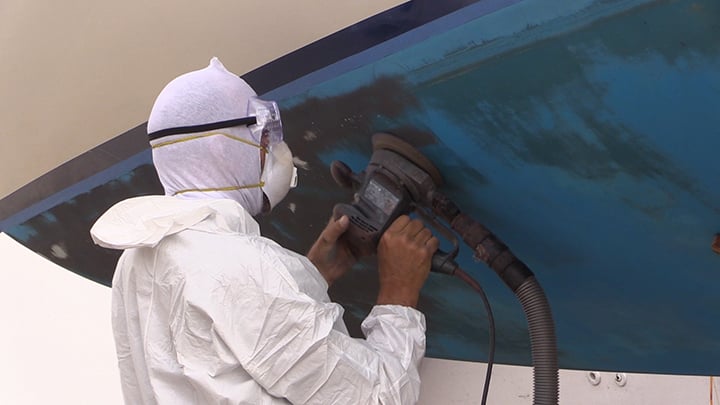
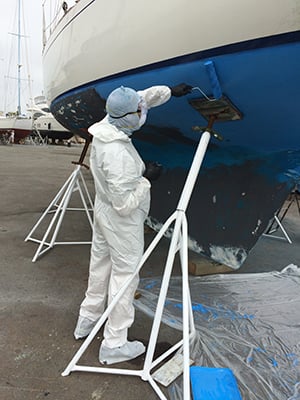
Once the surface has dried completely, we are ready to sand. Sanding is necessary to give the old surface some “tooth” to allow the fresh paint to mechanically adhere. Bottom paints are toxic by nature and most are solvent based, so you should always try to cover exposed skin, shield your eyes and wear a respirator to avoid breathing toxic fumes. We recommend outfitting yourself with a disposable coverall suit, gloves, high quality goggles and a dual-cartridge respirator. Now get to work!
First, lay out a large tarp or dropcloth to cover the entire work area. Knock off any loose paint with a scraper and, using either a sanding block or a dustless DA sander, lightly sand the entire bottom with 80-grit sandpaper. Spend a little extra time on any high or uneven areas. Try to achieve as smooth of a surface as possible to minimize underwater drag. Work around transducers, prop shaft struts and outdrives. When you have finished sanding, wipe down the surface with a rag and some solvent wash.
Masking Off Borders
Next, select a masking tape that’s right for the job. There are some things to keep in mind when selecting a tape. General purpose tapes are only designed to be left on a surface for 24 hours or less, unless you want a lengthy job of trying to remove the tape! Select a “long-mask” tape for bottom painting, especially when you’ll be applying multiple coats. 3M’s 2090 Scotch Blue Painter’s Tape is a good choice because it's UV-stable and can be left on for up to 60 days. Try to tape as close to the existing bootstripe as possible. Start from a natural break point in the line and draw the tape every 1.5' to 2' for a smooth, even border. Be sure to tape around transducers, prop shaft struts, through-hulls and any other metal parts, as the copper in the paint will react with the other metals and cause galvanic corrosion. 3M’s Fineline tape is the best choice for when you are ready to re-paint the bootstripe (or for any other painting task where you want the cleanest possible paint line).
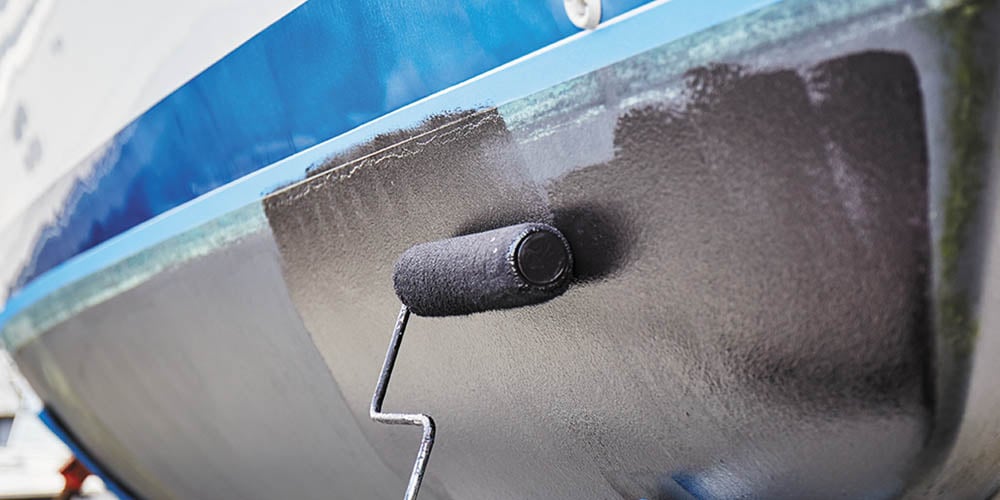
Applying the Paint
You’re now ready to start painting. Select the right paint accessories to match the type of paint you are applying. Spraying is not recommended for do-it-yourselfers as it involves serious toxic hazards. Rolling works best for most bottom paint applications, and a 3/8" nap solvent-resistant roller cover is the best match for most bottom paints. Don’t be tempted to try and use household-variety roller covers, brushes, or tray liners. Solvents used in bottom paints are much “hotter” than latex or oil-based household paints and will likely dissolve these applicators. (We’ve tried this and can speak from messy experience here!)
Thin-film paints such as VC-17m are too runny for such a heavy nap and are applied best either by rolling using a solvent-resistant foam roller cover or by spray with an airless sprayer. Make sure to get a few sizes of chip brushes to cut out around the masked areas and at the waterline.
Paint manufacturers’ instructions give single-coat square foot coverage and recommend the number of coats needed for optimum protection. Don’t try to economize on paint either by thinning it excessively (most bottom paints are applied unthinned) or by spreading it too thin.
Ablative paints in particular must be thickly applied. Apply extra coats in areas of turbulence such as the bow, rudder and leading edge of the keel. With copolymer and ablative paints, if you use a different color for the base coat, you’ll know it’s time to recoat when it begins to show through. Use the paint manufacturer’s coverage chart for an educated guess as to how much paint you’ll need to do the job. Get some special transducer antifouling paint to touch up any underwater transducers.
Have the paint shaken just prior to application. This will make stirring the copper back into solution much easier, because it will settle into a thick mass at the bottom of the can, making stirring a real chore. After thoroughly stirring the paint, pour into the paint tray and roll the paint evenly from one end of the boat to the other.
A Word About Timing
As you choose your paint and schedule your haulout, consider how much drying time you should allow between coats and how long the new paint can be left out of the water. Drying time between coats can vary from ten minutes for Teflon-based VC-17m to a 16-hour (or overnight) minimum for Trilux 33. For proper planning it is important to check the manufacturer’s recommendation in advance, both for the drying time and for the recommended number of coats. For example, West Marine’s most popular modified epoxy paint, BottomShield, has a drying time of four to six hours, and a maximum of 60 days before relaunch. Copolymer ablative paints have minimum overcoating times, and no maximum out-of-water time. Copolymers are a good choice for trailerable boats that need antifouling protection while in the water, but also spend time on the hard. Recoat following manufacturer recommendations regarding overcoating times, which can vary based on temperature.
Once the paint is dry, remove all masking tape and clean up the area. Be sure to properly dispose of the old paint and any solvents used for clean up. If your boat is on jack stands or a cradle, painting under pads can be tricky. Depending on the drying time for the paint, you may be able to paint under the pads or bunks when the boat is on the Travel-lift for launch. Check with your yard. Some paints will dry adequately in the short time it’s “in the air”.
For a detailed discussion of types of antifouling paint, see our West Advisor video with Chuck Hawley below.
Final Thoughts
Completing each of the key steps for painting your boat’s bottom is easy with the right knowledge base. We hope this Advisor and our companion video have helped answer your questions and helped you find the best products to do the job right the first time. Finally, for next year, consider this thought: spring weather can be unpredictable, and haul-out schedules in the yard are crowded. At season’s end, when you haul out for the winter, paint the hull bottom so you’ll be ready to launch in the spring, whatever the weather. Note that this only applies if you use a multi-season ablative type paint. Good luck! For further reading visit our extensive guide to Dewinterizing your boat.